How to Make a Paracord Bracelet: Step-by-Step Guide
Affiliate disclosure: Some links on this page are affiliate links. If you buy through them we earn a small commission at no extra cost to you. This never influences which products we recommend — we only suggest things we'd buy ourselves. Product prices and availability are accurate as of the date published and are subject to change. Always check Amazon for current pricing before purchasing. Learn more.
Quick Picks
Paracord!: How to Make the Best Bracelets, Lanyards, Key Chains, Buckles, and More
Covers multiple paracord project types in single guide
Buy on AmazonPARACORD 101: Beginners Guide to Paracord Techniques and Projects with Pictorial Project Guide on Bucklers, Bracelets,
Beginner-focused guide with pictorial instructions for easy learning
Buy on AmazonPSKOOK Paracord Bracelet Jig Kit, Paracord Tool Kit Adjustable Length Weaving DIY Craft Maker Tool (Army Green)
Adjustable length design accommodates various bracelet sizes
Buy on Amazon| Product | Price Range | Top Strength | Key Weakness | Buy |
|---|---|---|---|---|
| Paracord!: How to Make the Best Bracelets, Lanyards, Key Chains, Buckles, and More also consider | $$ | Covers multiple paracord project types in single guide | Book format less convenient than digital reference while crafting | Buy on Amazon |
| PARACORD 101: Beginners Guide to Paracord Techniques and Projects with Pictorial Project Guide on Bucklers, Bracelets, also consider | $$ | Beginner-focused guide with pictorial instructions for easy learning | Beginner guide may lack advanced techniques for experienced users | Buy on Amazon |
| PSKOOK Paracord Bracelet Jig Kit, Paracord Tool Kit Adjustable Length Weaving DIY Craft Maker Tool (Army Green) also consider | $$ | Adjustable length design accommodates various bracelet sizes | Jig-based tool requires learning proper weaving technique | Buy on Amazon |
| Paracord 550, 4mm, 7 Triple Strands Utility Rope, Parachute Cord for Survival Gear, Camping, Hiking, and DIY Bracelets, also consider | $$ | 550 paracord rating provides high tensile strength for survival applications | Generic or unknown brand may lack established reputation in cordage market | Buy on Amazon |
| Paracord bracelet instructions: Popular bracelets explained also consider | $$ | Instructional format helps beginners learn paracord bracelet weaving | Instructional product requires manual learning and practice time | Buy on Amazon |
| Practical Paracord Projects: Survival Bracelets, Lanyards, Dog Leashes, and Other Cool Things You Can Make Yourself also consider | $$ | Multiple practical projects included beyond basic survival bracelets | Instructional book format requires manual interpretation of tying techniques | Buy on Amazon |
| Paracord Crafts: 11 Projects Plus Tips and Techniques for Knotting also consider | $$ | Includes 11 complete projects plus knotting tips and techniques | Book format requires manual reading versus video instruction for visual learners | Buy on Amazon |
I’ve made a paracord bracelet exactly twice in my life before it clicked. The first time, I ended up with a knotted mess that looked like something I’d dragged out of a burn pile. The second time, I slowed down, used the right cord, and paid attention to tension. It came out clean.
A bracelet isn’t just a craft project. Unraveled, a standard cobra-weave bracelet gives you seven to ten feet of 550 paracord you can actually use in the field. That matters in the GW or out on a ridgeline trail in the Shenandoah.
What You Need Before You Start
Before you tie a single knot, you need to sort out your materials and your method. There’s no shortage of ways to get this wrong, and most of them come down to using the wrong cord or skipping the prep work.
Good paracord bracelet-making sits squarely in the broader world of cordage skills, and it’s one of the most approachable entry points if you’re new to working with rope. You don’t need a lot of gear. You need the right gear.
Cord
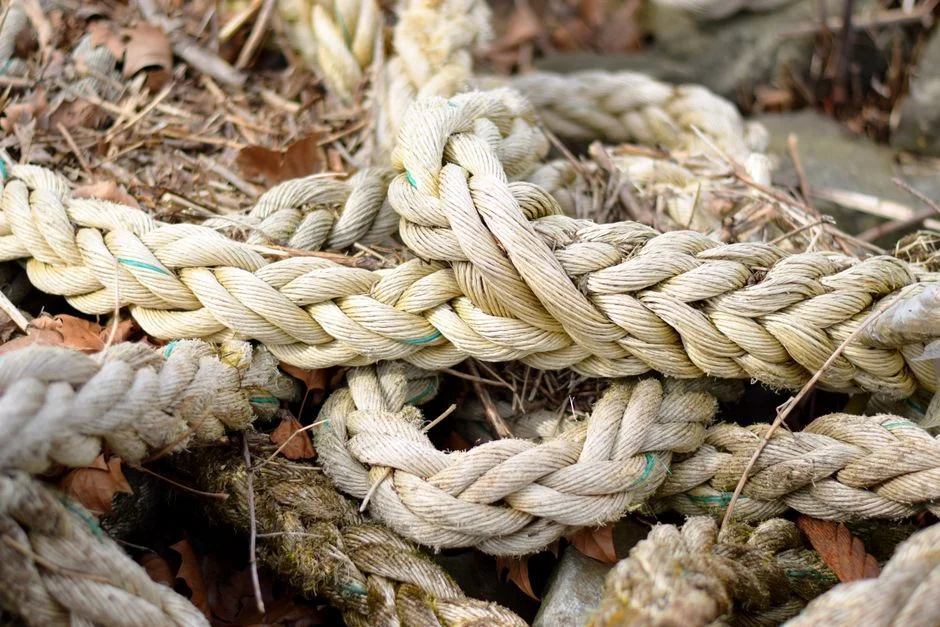
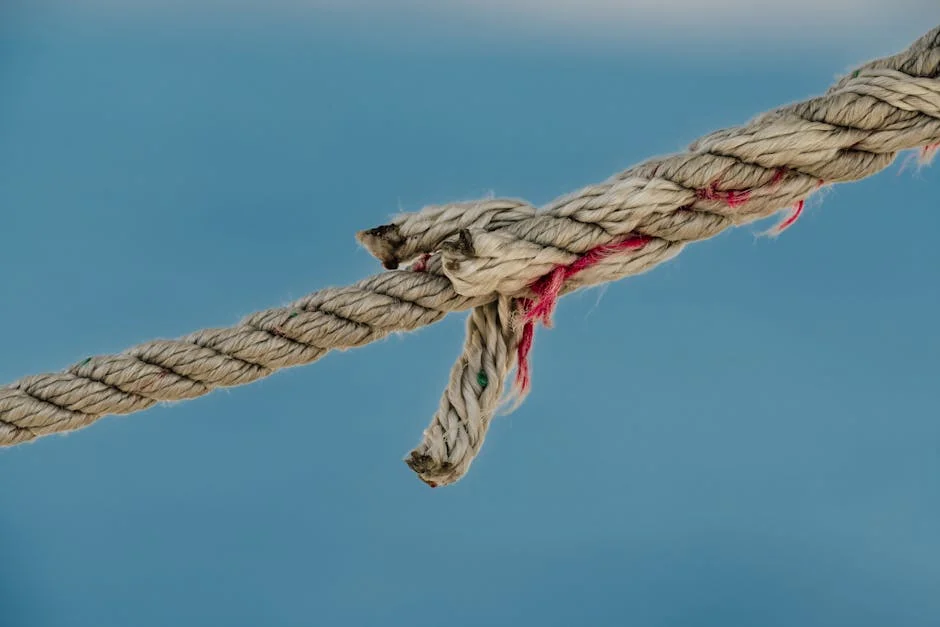
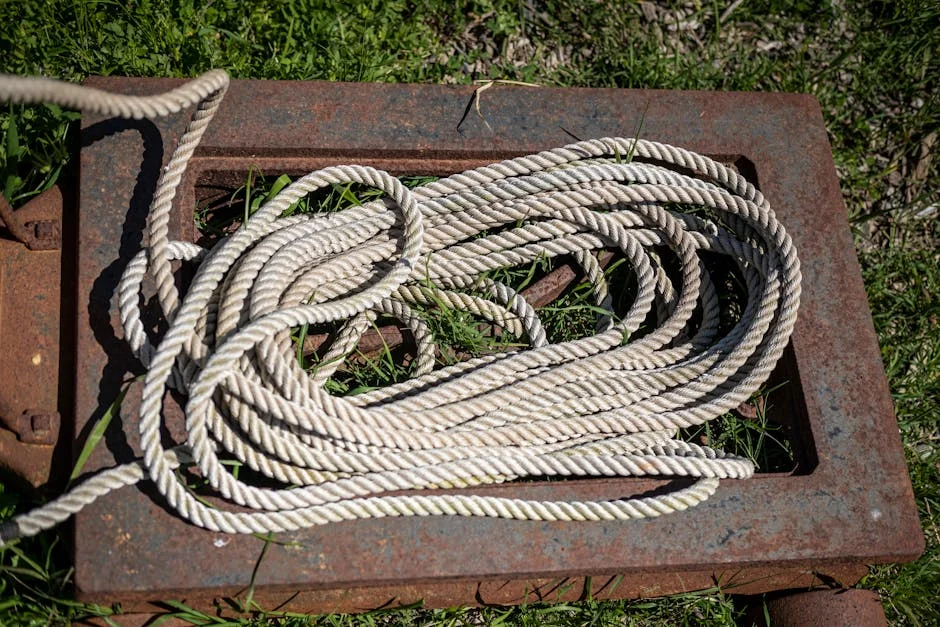
Get actual 550 paracord. Not “paracord-style” rope, not the decorative craft store stuff that comes in every color but performs like wet spaghetti under load. Real 550 paracord has a minimum breaking strength of 550 pounds, a nylon outer sheath, and seven inner strands. Those inner strands are what you’re after when you unravel the bracelet in the field.
The diameter matters too. Standard 550 paracord runs about 4mm. That’s the size you want for bracelets. Thicker cord makes a bracelet that sits stiff and uncomfortable on your wrist. Thinner cord doesn’t have the inner strand count to be genuinely useful.
Buckles and Tools
Plastic side-release buckles are standard for bracelets. You can find them at any craft store or online. Five-eighths inch width fits most bracelet widths. Avoid the cheap thin-walled ones. They crack in cold weather.
You’ll need a lighter or matches to melt the cord ends and prevent fraying. A pair of hemostats or needle-nose pliers helps tuck tight knots. A ruler or measuring tape is not optional. Wrist size and desired length matter more than people expect when they’re starting out.
Measuring Your Wrist
Measure your wrist with a soft tape or a strip of scrap cord. Add about one inch to get your actual bracelet length. A bracelet that’s too tight is uncomfortable and hard to unbuckle fast in the field. Too loose and it catches on everything.
A rough rule of thumb: for every inch of bracelet length, you’ll need about one foot of paracord per working strand. A standard cobra weave on a seven-inch bracelet uses two working strands and two core strands. That’s roughly fourteen to sixteen feet of total cord, depending on how tight you weave.
How to Make a Basic Cobra Weave Bracelet
The cobra weave (also called the Solomon bar) is the pattern most people mean when they say “paracord bracelet.” It’s symmetrical, it unravels cleanly, and the technique transfers to lanyards, keychains, and dog leashes once you have it down.
Step One: Set Up Your Core Strands
Thread one length of cord through both sides of your buckle so the buckle sits at the midpoint of the cord. This gives you two parallel core strands running down the length of the bracelet. These don’t do the weaving. They just hold the shape.
Set the buckle to your target bracelet length and hold the core strands taut. If you’re using a jig (more on that below), clamp both buckle ends in place now. If you’re working freehand, a clamp or a piece of tape on a flat surface keeps things from shifting.
Step Two: Start the Cobra Knot
Take a second length of cord, find the midpoint, and fold it in half around the left core strand. You now have a working strand on each side. Pass the right working strand over the two core strands. Pass the left working strand over the right, behind the cores, and up through the loop on the right side. Pull both working strands snug. That’s the first half of the cobra knot.
Mirror it. Right working strand over the cores, left working strand over the right, behind the cores, and up through the loop. Pull snug. That’s one full cobra knot. Repeat until you reach the second buckle piece.
Step Three: Finish and Melt
When you’re within a quarter inch of the second buckle, tie off the working strands and trim them close with scissors. Melt the cut ends immediately with a lighter. Press the melted nub flat with the side of the lighter while it’s still hot but not burning. Don’t skip the melt. Frayed cord ends work themselves loose inside the weave.
Clip both buckle ends in and test the fit. If it’s snug, that’s fine. The bracelet will loosen slightly after you wear it a few times.
Top Picks
Getting the right materials and references makes this much easier. Here’s what I’d point someone toward, whether you’re just learning the knots or looking for better cord.
Paracord 550, 4mm, 7 Triple Strands Utility Rope
Paracord 550, 4mm, 7 Triple Strands Utility Rope is the cord I’d recommend for bracelets. The 4mm diameter is correct for wrist-wear, and the seven-strand inner construction is what you want if you’re serious about having functional cordage on you and not just a decoration. The outer sheath on quality 550 cord resists abrasion reasonably well for its weight class.
I don’t know the brand history here, which I’ll say plainly. But the spec is what matters. Seven inner strands, 550-pound rating, 4mm diameter. That’s the checklist. If the cord in your hand meets those three criteria, you’re in good shape for bracelets and light field use.
Check current price on Amazon.
PSKOOK Paracord Bracelet Jig Kit
The PSKOOK Paracord Bracelet Jig Kit is worth having if you’re making more than one bracelet or if you’re teaching someone else the pattern. A jig holds your buckle ends at a fixed distance so you’re not fighting the cord and trying to maintain tension with your knees at the same time. It’s adjustable, which means you can dial in the length before you start weaving instead of guessing.
Freehand bracelets are fine once you know what you’re doing. When you’re learning, a jig removes one variable from a process that already has several. The army green version is what I’ve seen most often and it’s a mid-range buy that won’t put a dent in your materials budget.
Check current price on Amazon.
Paracord! How to Make the Best Bracelets, Lanyards, Key Chains, Buckles, and More
Paracord! How to Make the Best Bracelets, Lanyards, Key Chains, Buckles, and More covers more ground than just bracelets. If you’re going to sit down with a book to learn this, you want one that teaches you enough to make something besides a single cobra weave. Lanyards and key fobs use the same basic technique but build the muscle memory faster because they’re shorter projects.
The physical book format is a little inconvenient when your hands are covered in cord and you need to look something up. That’s a real limitation. But for the initial learning phase, a printed reference you can prop up on the workbench beats scrolling through a phone with sticky fingers.
Check current price on Amazon.
PARACORD 101: Beginners Guide to Paracord Techniques and Projects
PARACORD 101: Beginners Guide to Paracord Techniques and Projects with Pictorial Project Guide on Bucklers, Bracelets leans heavily on pictures, which is the right call for visual learners. Knot diagrams in written form are genuinely hard to parse when you’re just starting out. Having a clear photo sequence of each step makes a difference.
This is a beginner-focused guide and it doesn’t pretend otherwise. If you already know the cobra weave and you’re hunting for more advanced patterns like the king cobra or the trilobite, this probably isn’t the book for you. But if you’re starting from zero, the pictorial format shortens the learning curve.
Check current price on Amazon.
Paracord Bracelet Instructions: Popular Bracelets Explained
Paracord bracelet instructions: Popular bracelets explained covers multiple patterns in one place. Once you have the cobra weave down, you’ll want to know what else is out there. The fishtail, the box stitch, and the half hitch spiral all use the same materials but produce very different finished looks and unravel differently too.
I’ll be honest that I don’t know this brand’s reputation in the market. What I can say is that covering multiple popular patterns in one instructional format is the right structure for someone who’s past the basics and wants to keep learning without hunting down a different book for every new pattern.
Check current price on Amazon.
Practical Paracord Projects: Survival Bracelets, Lanyards, Dog Leashes, and Other Cool Things You Can Make Yourself
Practical Paracord Projects: Survival Bracelets, Lanyards, Dog Leashes, and Other Cool Things You Can Make Yourself is the guide I’d hand someone who wants to move beyond bracelets without abandoning the skills they’ve already built. Dog leashes in particular are a project that uses a lot of the same knotwork but requires planning for load and abrasion in a way that a bracelet doesn’t.
The DIY format means you can customize sizing and color, which matters if you’re making something as a gift or trying to match colors to a specific piece of gear. The book doesn’t include cord, so budget separately for materials.
Check current price on Amazon.
Paracord Crafts: 11 Projects Plus Tips and Techniques for Knotting
Paracord Crafts: 11 Projects Plus Tips and Techniques for Knotting rounds out the list with eleven complete projects and a section specifically on knotting technique. The technique section is worth the price alone if you’re trying to understand why your knots are pulling crooked or why your tension is inconsistent from row to row.
Eleven projects is a reasonable scope for a single guide. It’s not exhaustive, and advanced crafters who’ve already worked through most of the common patterns may find the upper end of the book familiar. For anyone in the first year of working with paracord, though, eleven projects gives you plenty to practice.
Check current price on Amazon.
Buying Guide: What to Look For
Cord Grade and Construction
The most important decision you make before starting a bracelet is which cord you buy. Not all paracord is the same. The 550 rating refers to minimum tensile strength in pounds. That number only means something if the cord is actually constructed to spec, with seven inner strands inside a braided nylon sheath.
There’s a lot of decorative cord on the market that looks like paracord but has four inner strands or none at all. For a craft project you’re going to hang on a wall, that doesn’t matter. For a bracelet you plan to unravel in the field if you need cordage, it does. Check the strand count before you buy.
The broader world of working with cordage includes a lot of rope types with different strengths and uses. Paracord sits in a specific sweet spot: light, packable, and strong enough for most camp tasks. It’s not rigging rope. But it handles lashing, emergency repairs, and replacing a broken bootlace without complaint.
Pattern Complexity and Learning Curve
The cobra weave is the right starting point. It’s the most common bracelet pattern for a reason. The knot is simple, the steps are repeatable, and the finished product is functional rather than just decorative.
After the cobra weave, the king cobra (a second pass over a finished cobra bracelet) and the fishtail are logical next steps. Each one teaches you something about tension management that carries over to other knot work. Don’t skip straight to a trilobite or a viper weave. You’ll get discouraged and the bracelet will look like what happened to me the first time.
Jig vs. Freehand
A jig is a legitimate tool and not a shortcut. Holding consistent tension over the length of a bracelet while keeping both buckle ends in place is harder than it sounds, especially on your first few attempts. A jig solves the geometry problem so you can focus on the knotting.
Freehand work is more portable and requires no extra equipment. Once you’ve made five or six bracelets, freehand is probably faster. But in the learning phase, there’s no shame in clamping your work down and taking it one knot at a time.
Buckle Quality
A five-eighths inch side-release buckle is standard. The width matters for fit and for how cleanly the finished bracelet lays on your wrist. Cheap thin-walled buckles are a false economy. They crack in cold temperatures and the release mechanism gets stiff when the plastic degrades.
If you’re making bracelets to wear in the field rather than just at home, spend a little more on buckles. Metal side-release buckles exist and are worth considering if you expect hard use or extended cold weather exposure.
Finishing Your Bracelet Properly
The melt finish on cord ends is not optional. Cut ends of nylon cord fray fast, and loose ends work their way through the weave and loosen knots from the inside. Melt every cut end and press it flat while it’s still soft.
A set of hemostats or needle-nose pliers makes the final tucks much easier. The last two or three rows of a cobra weave get tight, and trying to pull working strands through with bare fingers results in uneven tension and, often, a bracelet that looks finished from three feet away but sloppy up close. Good finishing tools are a one-time buy that pays off on every project after the first.
Closing Thoughts
Making paracord bracelets is one of those skills that looks fiddly until you’ve done it a few times. Then it becomes something you can do in front of the TV on a Sunday evening and have something genuinely useful at the end. I’ve got one on my wrist right now, and the ten feet of 550 cord in it has been there since last fall when I was out in the Jefferson National Forest for a few days. It’s not decorative to me. It’s just cord I’m keeping organized until I need it.
If you’re new to working with rope in general, paracord bracelets are a solid place to start. And if you want to go deeper into cordage skills beyond the bracelet, the cordage skills section here has more on knots, rope materials, and field applications worth knowing.
Frequently Asked Questions
How much paracord do I need for a bracelet?
The standard estimate is about one foot of paracord per inch of bracelet length, but that applies to each working strand. A cobra weave bracelet uses two working strands, so a seven-inch bracelet needs roughly fourteen feet of total cord. Add a foot or two as a buffer, because running short on the last few rows is genuinely frustrating. It’s better to trim and melt the excess than to restart.
What size buckle should I use for a paracord bracelet?
Five-eighths inch side-release buckles are the most common size for standard bracelets. They fit the typical 550 cord width and sit comfortably on most adult wrists without looking oversized. If you’re making a bracelet for a child or using thinner cord, a half-inch buckle works better. Avoid mixing different buckle widths in the same project, since they require different amounts of cord to thread correctly.
Can I actually use a paracord bracelet for survival situations?
Yes, with realistic expectations. A standard cobra weave bracelet on a seven-inch wrist gives you roughly seven to ten feet of 550 paracord once unraveled. That’s enough for lashing a splint, repairing a pack strap, replacing a bootlace, or hanging a small tarp ridgeline. The inner strands work as fishing line or thread in a pinch.
Is 550 paracord the right choice for bracelets, or are there better options?
For most purposes, 550 paracord is the right call. It’s the most widely available, the most affordable, and the most useful if you ever need to unravel the bracelet and use the cord. Some people use 275 paracord for slimmer, lighter bracelets, but the inner strand count drops significantly and the practical value in the field goes down with it. Unless weight is a serious concern, stick with 550.
How do I keep my bracelet from looking uneven or lumpy?
Consistent tension is the single biggest factor in bracelet appearance. Each cobra knot needs to be pulled to the same tightness as the one before it. The most common mistake is pulling the first few knots tight and letting tension drift as you get tired or distracted. Working on a jig helps because it keeps the core strands straight and gives you a visual reference. If your bracelet is already done and looks uneven, the only fix is to redo the affected section.
<script type="application/ld+json">
{
"@context": "https://schema.org",
"@type": "FAQPage",
"mainEntity": [
{
"@type": "Question",
"name": "How much paracord do I need for a bracelet?",
"acceptedAnswer": {
"@type": "Answer",
"text": "The standard estimate is about one foot of paracord per inch of bracelet length, but that applies to each working strand. A cobra weave bracelet uses two working strands, so a seven-inch bracelet needs roughly fourteen feet of total cord. Add a foot or two as a buffer, because running short on the last few rows is genuinely frustrating. It's better to trim and melt the excess than to restart."
}
},
{
"@type": "Question",
"name": "What size buckle should I use for a paracord bracelet?",
"acceptedAnswer": {
"@type": "Answer",
"text": "Five-eighths inch side-release buckles are the most common size for standard bracelets. They fit the typical 550 cord width and sit comfortably on most adult wrists without looking oversized. If you're making a bracelet for a child or using thinner cord, a half-inch buckle works better. Avoid mixing different buckle widths in the same project, since they require different amounts of cord to thread correctly."
}
},
{
"@type": "Question",
"name": "Can I actually use a paracord bracelet for survival situations?",
"acceptedAnswer": {
"@type": "Answer",
"text": "Yes, with realistic expectations. A standard cobra weave bracelet on a seven-inch wrist gives you roughly seven to ten feet of 550 paracord once unraveled. That's enough for lashing a splint, repairing a pack strap, replacing a bootlace, or hanging a small tarp ridgeline. The inner strands work as fishing line or thread in a pinch. It's not a substitute for carrying dedicated cordage, but it's better than nothing and it's always on your wrist."
}
},
{
"@type": "Question",
"name": "Is 550 paracord the right choice for bracelets, or are there better options?",
"acceptedAnswer": {
"@type": "Answer",
"text": "For most purposes, 550 paracord is the right call. It's the most widely available, the most affordable, and the most useful if you ever need to unravel the bracelet and use the cord. Some people use 275 paracord for slimmer, lighter bracelets, but the inner strand count drops significantly and the practical value in the field goes down with it. Unless weight is a serious concern, stick with 550."
}
},
{
"@type": "Question",
"name": "How do I keep my bracelet from looking uneven or lumpy?",
"acceptedAnswer": {
"@type": "Answer",
"text": "Consistent tension is the single biggest factor in bracelet appearance. Each cobra knot needs to be pulled to the same tightness as the one before it. The most common mistake is pulling the first few knots tight and letting tension drift as you get tired or distracted. Working on a jig helps because it keeps the core strands straight and gives you a visual reference. If your bracelet is already done and looks uneven, the only fix is to redo the affected section."
}
}
]
}
</script>Where to Buy
Paracord!: How to Make the Best Bracelets, Lanyards, Key Chains, Buckles, and MoreSee Paracord!: How to Make the Best Brace… on Amazon